Ever felt nervous to make your own pie crust from scratch? Same! Right here with ya fellow pie lover … when when I decided to write a cookbook about Harbor Country, a place that’s practically synonymous with homemade pie, I knew I needed to conquer my from-scratch pie crust fears. You are the lucky recipient of hours spent perfecting this all butter beauty, that’s truly so simple, you’ll feel like pie crust king or queen! The directions LOOK long, but it’s ONLY because I describe the steps in detail – so anyone can follow them, lol, literally anyone. This crust comes together in no time and once you make it, you’ll say, well that was easy 😉
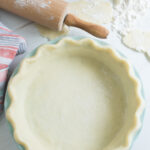
Easy as Pie Crust
Scared of making homemade pie crust? Never fear, because the EASIEST pie crust is finally here! It's an all butter beauty, flaky and light, sure to treat your tastebuds just right. Vegan you say? That's ok … use vegan butter and bake away! Want to make this gluten free? Try Cup4Cup Multipurpose Flour and you'll have GF crust within the hour.
Ingredients
- 1 1/8 cups 1 stick plus 2 tablespoons very cold salted or vegan butter, cut into 1/3-inch cubes
- 1 1/3 cups gluten-free all-purpose flour with xanthan gum or regular all-purpose flour plus more as needed (I use Cup4Cup Multipurpose Flour.)
- 2 tablespoons granulated sugar
- 1/4 teaspoon kosher or sea salt
- 2-4 tablespoons ice water ice removed
Instructions
Standing Mixer Method
-
Place the cold, cubed butter in the freezer for 10 minutes. Add the flour, sugar, and salt to the bowl of a standing mixer with the paddle attachment. Mix on medium speed for 1 minute, until evenly blended. Pause the mixer and scatter the cold butter cubes evenly across the flour. Gently toss with a spoon to coat the butter pieces in flour. Mix on medium-low speed for about 3 minutes, or until the flour/butter mixture resembles coarse sand and the butter pieces are the size of green peas. Use a fork or pastry cutter to break up any remaining butter pieces that look too large. With the mixer on low, slowly drizzle in the ice water, 1 tablespoon at a time, and mix on low to medium-low speed until the dough just pulls together, barely forming a ball. Don’t overmix or the crust will be tough.
Create a Work Surface to Roll Out the Crust
-
Place two pieces of parchment paper, each piece about 20 inches long, side by side on a flat surface. Sprinkle one sheet lightly with your flour of choice. Set a rolling pin nearby.
Rest the Dough
-
Transfer the dough ball to the floured parchment paper and form into a ball. (If you doubled the recipe to make two crusts, cut the ball in half). Pat the ball into a flattened disk about 3/4 inch thick. Wrap the dough in plastic wrap and refrigerate for 20 minutes. (At this stage, the dough can be refrigerated for several hours or overnight if desired, but remove from the refrigerator about 30 minutes before rolling out.)
Roll Out the Dough
-
Remove the dough from the refrigerator. Sprinkle a bit more flour on the parchment paper and place the disk in the center of the parchment paper. Sprinkle the top of the disk and rolling pin lightly with flour as needed (not too much or the dough will be tough), then cover the disk with the second sheet of parchment paper. Roll out into a circle about 12 inches wide and 1/3 inch thick, turning the disk as needed. Once you’ve rolled it out, hold a pie pan over the center of the dough to ensure it’s large enough to cover the pan.
Rolling Pin Transfer Trick
-
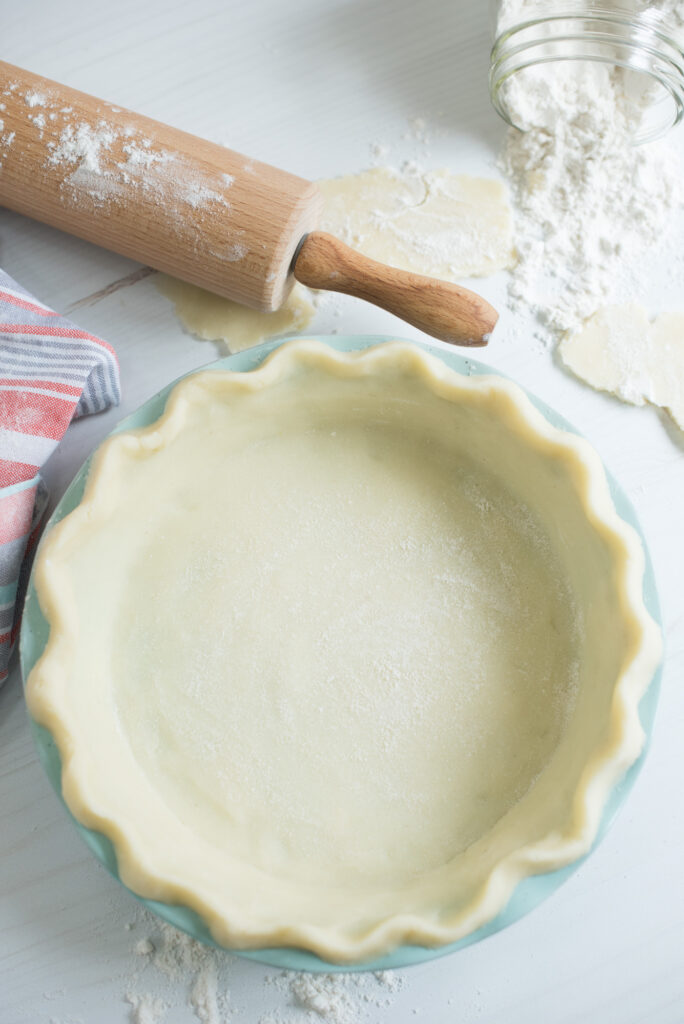
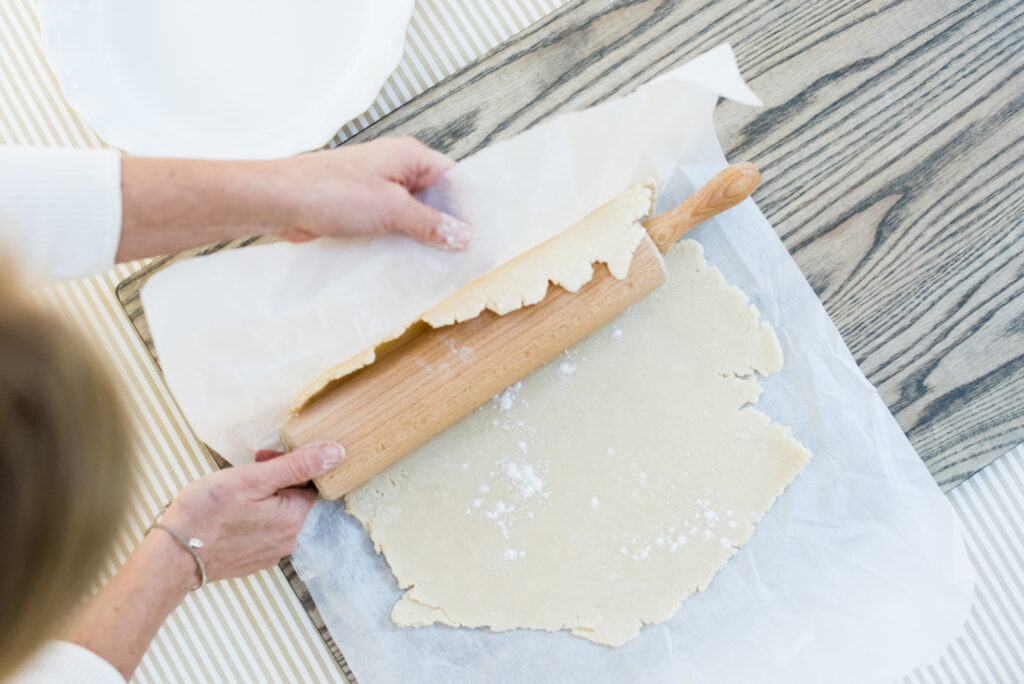
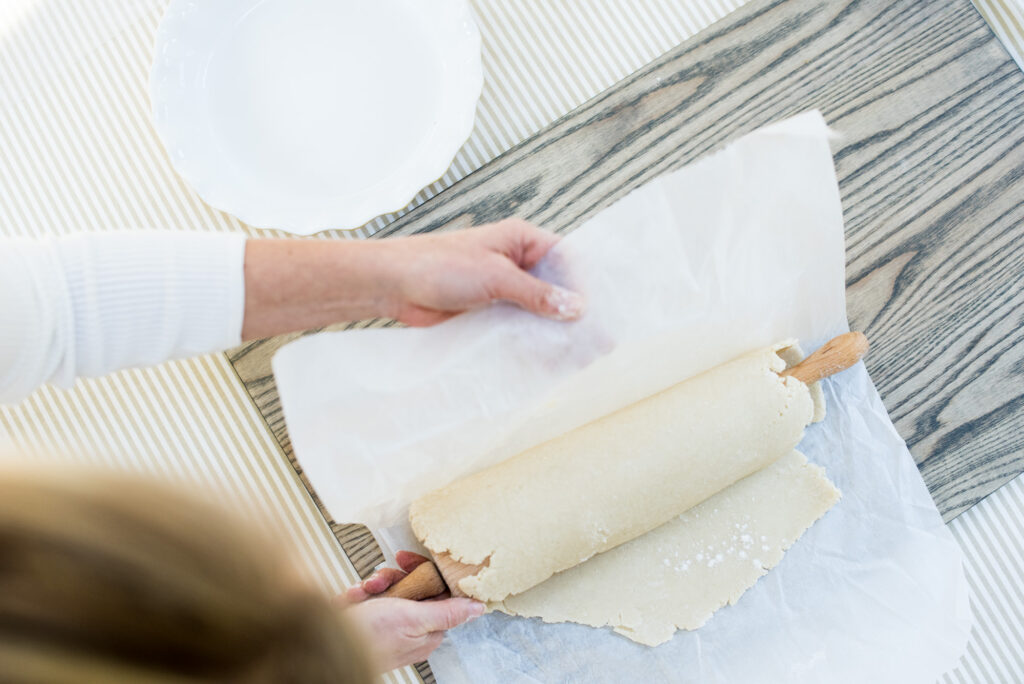
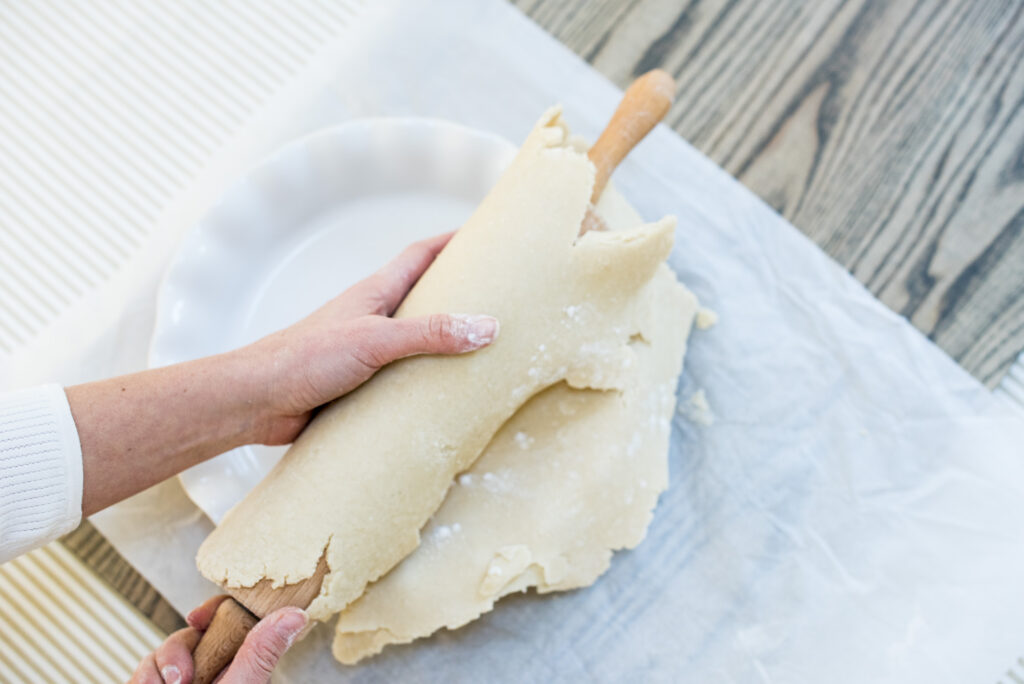
Use your rolling pin to transfer the dough to the pie pan by placing the rolling pin at one end of the dough disk. Pull up the parchment paper at that end to help the dough roll up and over the pin, and continue to turn the rolling pin with the other hand until most of your dough is around the pin. Use both hands to gently drape the dough over the pie pan, allowing it to settle into the center and edges. Softly press the dough into the pan, smoothing out any bubbles. Trim the edges as needed with a sharp knife. Use your fingers to crimp the edges into a wavy, fluted design as shown in the photo, or press the edges down and lightly imprint them with a fork. If the dough doesn’t easily pull away from the parchment paper as you try to transfer it to the pie pan, refrigerate the rolled-out dough sheet for another 10 minutes before placing it in the pie pan.
Recipe Notes
Double Pie Crust Version
Double the recipe and cut the dough ball in half. Follow the “Roll Out the Dough” directions. Line a pie pan with 1 crust. Pat the second ball into a disk and refrigerate until ready to use. Remove from the refrigerator 30 minutes prior to use.
By-Hand Method
If you don’t have a standing mixer, make this crust by hand.
Place the cold, cubed butter in the freezer for 10 minutes. In a large bowl, whisk together the flour, sugar, and salt. Scatter the cold butter cubes evenly across the flour mixture. Use a pastry cutter or two knives to cut the butter into the flour mixture until the texture resembles coarse sand and the butter pieces are no larger than green peas. (Avoid using hands, as they make butter too warm.) Drizzle in the ice water, 1 tablespoon at a time, and mix with a fork or pastry cutter until the dough just pulls together, barely forming a ball. Don’t overmix or the crust will be tough.
Follow the rest of the directions, starting with the step “Create a Work Surface to Roll Out the Crust.”
Tips for Success
Make sure your butter is very cold.
If you’re baking solo, fold the parchment paper edge over the end of the table or counter and press your waist against it to hold the paper still while you roll it out. To roll out a pie crust evenly, apply even pressure across the rolling pin as you roll forward and back again, turning the disk of dough as needed.
